How to Give Poured Concrete Walls an Exposed Aggregate Finish
A step-by-step guide to in-form retarders for seat walls, retaining walls, and more.
Structural poured concrete walls end up behind siding, under backfill, or in a basement. Plain gray is fine since they aren’t front and center. But seat walls, retaining walls, planter walls, and monument walls are different. They’re on full display, and plain concrete can look out of place beside a stamped patio or stained walkway. On these jobs, the finish is an important part of the work.

An in-form retarder turns a wall you’re already forming into a decorative concrete wall. The retarder goes on the forms before placement. When you strip and wash, the paste rinses away and the aggregate is exposed. No sandblasting, and no acid washing required.
If you can build forms and run a pressure washer, you already have most of the skills this takes. The key is getting the retarder application and timing right. Here’s the process, from form prep to wash-off.
Why Choose Exposed Aggregate Walls?
Board-formed concrete, form liners, and vertical overlays all offer ways to dress up a concrete wall. Exposed aggregate gives you another option. It reveals the stone already in the mix, for a natural, textured wall face.
By varying the aggregate and depth of exposure, you can produce anything from a fine, sand-like texture to a rugged stone face. Add integral color to complement the aggregate, and you get texture and color in a single pour.
For the client, that means:
- A natural stone look on a cast-in-place wall
- A durable finish that won’t peel like a coating
- Walls that pair with stamped, stained, or exposed aggregate flatwork
For you, it adds value to a wall you’re already forming, without a separate finishing operation later.


Where to use exposed aggregate walls
It works on just about any wall you pour:
- Residential: Seat walls, retaining walls, planter walls, garden and screen walls, outdoor kitchen bases, columns, and spa surrounds or fountain walls
- Commercial: Monument and sign walls, site walls, building facades, sound walls, bridge abutments, and precast panels
Exposed foundation and stem walls are another opportunity. Instead of leaving a strip of gray concrete between the siding and landscaping, you can give it a finish that complements the rest of the project.
How In-Form Retarders Work on Poured Concrete Walls
On flatwork, you can spray a traditional surface retarder like Brickform Select-Etch directly onto a fresh slab. With walls, the face is hidden behind the forms, so the retarder is applied to the forms before placement.

Brickform’s Altus In-Form Retarders are designed for this process. Once applied, the retarder dries into a film that stays in place as you pour concrete against it. It slows the hardening of the cement paste at the surface. After you pull the forms, pressure wash away the paste to reveal the finished texture.
Here’s what to know:
- Ten exposure grades. Color-coded options control how deeply the aggregate is exposed, from a light sand finish to full exposure.
- Compatible with common form materials. MDO and HDO give the most predictable results, but steel, concrete, and standard plywood forms work too.
- Simple application. Apply by roller, brush, or sprayer.
- No sandblasting required. A pressure washer removes the paste.
How to Expose Aggregate on Poured Concrete Walls
1. Pick a grade.
Match the grade to your aggregate size and how much stone you want to show. The full grade chart is on the Altus product page. Build a mockup using the same mix and form materials planned for the job. This helps confirm the exposure grade and establish a starting point for stripping and wash-off timing.
2. Prep the forms.
On MDO or HDO, apply Altus directly. Raw plywood and other wood forms need a coat of Form Seal first.
3. Apply the retarder.
Mix thoroughly and apply an even coat to the form faces. A gallon covers about 300 to 350 square feet. Let it dry, usually 20 to 40 minutes, before placing concrete. If you coat panels before assembly, handle them carefully so you don’t damage the film. Film thickness and tool specs are on the TIS.
4. Keep it dry.
Once the retarder is on the forms, moisture is the main risk. Rain, dew, or high humidity can activate it before the concrete arrives. As long as the film stays dry, it will wait for the pour. Cover if rain is coming. If the film gets wet, remove it and reapply before placement.
5. Place and consolidate.
Use an elbow on the pump hose to aim concrete down into the form, and splash boards to deflect it away from the form faces, so the retarder film doesn’t get scuffed off. On taller walls, keep lift intervals within 30 to 40 minutes to avoid pour lines. Vibrate inside the form and on the outside. The top of the wall isn’t against a form, so finish it separately or plan for a cap.
“The finer the exposure, the more you’re going to see any imperfections. Plus you’ll see bug holes, which are a pain to patch. Make sure you consolidate well.”
— John Reynolds, Brickform technical expert and trainer
6. Strip and wash.
Set times vary with temperature and mix design, so time the wash from your mockup, not the clock. Wash too late and the paste keeps gaining strength, making it harder to remove evenly. Wash too early and you risk loosening aggregate. Strip two or three panels at a time and rinse as you go, so the paste doesn’t harden on you at the far end of the wall.
7. Inspect and clean.
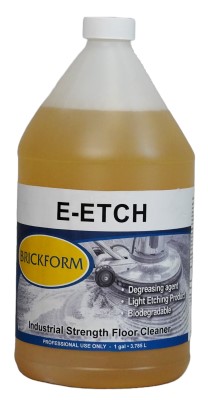
Once the wall is washed, check for even exposure. Touch up any spots with leftover paste using Micro Finish Gel, then wash the wall with E-Etch and Neutra Clean.
8. Cure and seal.
Cure to ACI standards, then seal to help protect the finish. Brickform options include Stealth Seal, Gem Seal, and Cure and Seal WB. See the full sealer line for more.
Taking it Further with Patterns and Multiple Exposures
You aren’t limited to one exposure per wall. Mask areas of the form with vinyl stencils or tape, apply one grade, then peel the masking and apply a second grade. The retarder doesn’t bleed under the tape when it’s properly applied, so you get crisp lines between finishes. Logos, bands, borders, and geometric patterns all come out of the same pour.

Done right, your wall has even exposure and consistent color on every face. The rock and pigment are part of the concrete, not something applied after. It’s a decorative concrete wall built with the same crew, forms, and pour you’d use for a plain one, but with an eye-catching result.
Get Started with Altus
Altus In-Form Retarders are sold through Brickform’s nationwide distributor network. Find a distributor near you, or visit the Altus product page for the grade chart, TIS, and SDS. For hands-on instruction, check Brickform’s training schedule, or call technical support at 800-624-0261.
See More