How to Stamp Concrete: A Step-by-Step DIY Guide
Learn about the tools, information, and materials you need to successfully stamp a concrete surface yourself.

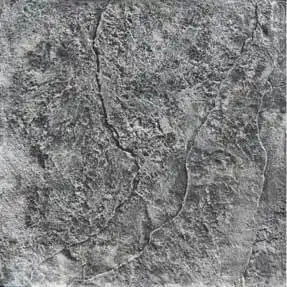
Stamped concrete lets you create custom designs on patios, driveways, pool decks, and more. By pressing patterns into wet concrete (or a special coating), you can achieve the look of stone, brick, or tile—for a fraction of the cost.
Can You Stamp Concrete Yourself?
Yes! With the right materials, tools, and guidance, DIY enthusiasts can stamp concrete surfaces and achieve good-looking results. However, it’s important to know what’s involved so you can plan properly.
Here’s what a DIY stamped concrete project takes:
- Time: Expect the project to take around 3 days from start to finish, including prep, stamping, and sealing.
- Skill Level: This is an intermediate-level project. It’s manageable for a determined DIYer, but attention to detail and timing are crucial.
- People: You’ll need at least 2 people, but having 3 people on hand will make the process go much smoother—especially during the stamping phase.
If this is your first time stamping concrete, we recommend starting with a smaller project, such as a garden path, to practice your technique and build confidence.
Here’s What You’ll Need for a Stamping Project
Essential Concrete Tools
- Mixing & Pouring: Concrete mixer or wheelbarrow, screed
- Finishing: Concrete float, trowel, edging and jointing tools
- Safety Gear: Gloves, goggles, a disposable respirator mask, sturdy shoes
Did You Know? Stamping concrete is a very messy job! Expect dust, splatter, and residue, so wear old clothes and protect nearby surfaces.
Special Stamping Equipment & Materials
- Stamping mats or skins
- You’ll need more than just a single stamp—these flexible tools, typically made of durable polyurethane, come in sets to cover large areas and ensure consistent patterns.
- You’ll need enough concrete stamps to go the width of the job and onto the next row.
- Concrete or overlay mix
- If you plan to pour a brand-new surface, you’ll need to know how much mix you’ll need. Check out this concrete calculator to determine how much concrete you need.
- Did you know you can also add color to the mix? Check out Brickform’s Integral Color options.
- If you are working with an existing concrete surface, you’ll use an overlay. Brickform’s Stampable Overlay is applied over existing, structurally sound concrete.
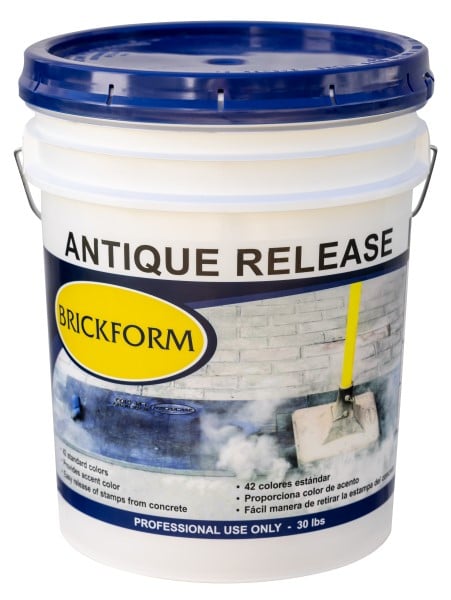
- Release agent
- Brickform’s Antique Release imparts color while also serving as a bond breaker for stamping.
- Brickform’s Liquid Release is a colorless product that forms a barrier to prevent stamps or texture skins from sticking to the concrete.
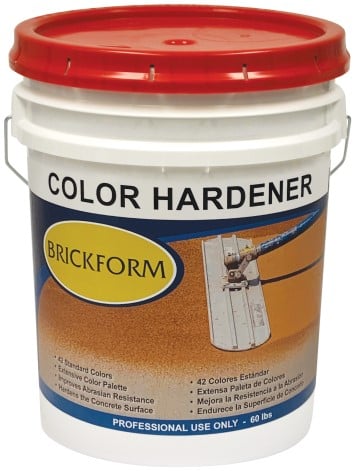
- Color hardener (optional)
- A powder applied to fresh concrete to add color and strengthen the surface, making it more durable and vibrant.
- Note that if you are using integral color, color hardener is not necessary. Using color hardener requires additional timing and finishing.
Disclaimer: Before getting started on your stamped concrete, it’s critical that you read the Technical Information Sheets for each product you’ll be using. They are full of useful information about timing, mixing, coverage rates and more.
Choosing Your Stamps
For DIYers, we recommend starting with seamless texture skins instead of patterned stamps. These are the best concrete stamps for beginners since they don’t require precise pattern alignment.
Keep in mind that you need enough stamps to cover the width of the job and onto the next row. So, depending on the size of the area you’re stamping, you may need around 6 stamps.
You can purchase stamps from your local construction supply store. Use this map to find a Brickform stamp distributor near you. If this is a one-time project for you, you may want to ask about renting a set of stamps.

Considerations Before Stamping
Here are some important things to think through before you purchase products or begin stamping your surface.
- How will you apply color?
If you’re using integral color, it needs to be added to your concrete mix. - When can you start stamping?
When the concrete is firm but still pliable. A simple test: press your thumb into the surface—it should leave a ¼-inch-deep impression. - Get your timing right.
Make sure you have enough time to stamp the surface after pouring your concrete. For example, if you pour your concrete surface in late afternoon, you may not have time to complete stamping the surface before the sun goes down. - What concrete will you use?
Will you mix your own concrete or order from a ready mix company? If you’re ordering from a ready-mix company, keep in mind that they might have charges for orders less than one yard. - Have a game plan.
Plan ahead to keep the process smooth. Decide where to place the first stamp and how to orient them before you start. A dry run—laying the stamps out ahead of time on the ground—helps ensure you know what to expect.
Did You Know? If you’re working in hot or dry weather, your concrete can be more difficult to finish! Use DAY1 to make finishing easier while extending workability. Also consider pouring in the morning to avoid peak sun and heat.
Project Timeline: What to Expect Day by Day
Stamping concrete takes careful planning and timing. Here’s a general breakdown of what to expect:
- Day 1: Prep & Setup – Gather tools and materials, prep the area, and install forms.
- Day 2: Pour & Stamp – Mix, pour, and screed the concrete, then stamp it while it’s still workable.
- Day 3: Finishing Touches – Apply secondary color (if using), allow the concrete to cure, and clean up the site.

Placing the Slab
Before you jump into stamping your concrete, you’ll need to pour and finish the slab. A well-prepared, properly finished slab is key to achieving crisp, professional-looking stamp impressions.
Here’s a quick overview of what’s involved:
- Ground Prep – Ensures a stable, even base.
- Forming – Defines the shape and thickness of your slab.
- Mixing – Sand, cement, aggregate and water need to be consistently mixed.
- Pouring – Distributes the concrete evenly.
- Screeding – Levels the surface before finishing.
- Bullfloating – Flattens the surface and pushes down large aggregate.
- Troweling – Creates a smooth, workable surface for stamping.
- Jointing – Tool in control joints with a groover to prevent cracking as the concrete cures.
Did You Know? The best concrete mix for stamping has a smooth, creamy top layer—this helps create clean, detailed impressions. If the mix has too much coarse gravel and not enough cement paste, stamping will be much harder and the texture may not imprint well. If you’re ordering from a ready-mix supplier, ask for a “stampable mix”.
For more in-depth instructions, check out this Guide to Pouring Concrete from ConcreteNetwork.com.
How to Stamp a Concrete Surface
Here’s a general overview of the process of stamping for those who are pouring a new concrete surface.

Step 1: Broadcast Color Hardener
This step isn’t necessary if you’re working with concrete that’s integrally colored. You can use it if you’re working with gray concrete or you’re strategically looking to further enhance the color of the concrete. Some even use it to create a marbled effect.
- Allow it to absorb moisture and then float it into the concrete using a wood, resin, or magnesium float.
- If you’re using color hardener, evenly distribute the product onto the surface.
- Read the manufacturer’s instructions for the recommended coverage rate.
Step 2: Apply Release Agent
To prevent stamps from sticking, apply a light, even coat of release agent to both the stamp and the surface.
- For liquid release, use a sprayer to coat only the area you’re about to stamp. Don’t apply it to the entire slab at once—liquid release evaporates quickly.
- For powder release, use a mason’s brush to gently dust the surface with a thin, even layer.
- Avoid overapplying—too much release can cause poor adhesion or streaking.
Did You Know? For DIYers, liquid release is the best option! It’s easier to apply, cleaner to work with, and doesn’t need to be washed off like powdered release. Simply spray it on, stamp, and you’re good to go!

Step 3: Begin Stamping
- Carefully place the first stamp or texture skin, ensuring you set it down evenly.
- If using texture skins, overlap edges slightly to avoid seams and rotate each skin to create a more natural, random look.
- When using patterned stamps, start in a corner or along the longest edge to keep the pattern aligned across the entire surface.
- Apply even pressure when stamping. If using a tamper, choose a soft-faced one to ensure consistent pressure and prevent dents in the pattern.
- Continue placing stamps until you don’t have any left.
- Go back to the first stamp you placed and carefully peel then lift to preserve the pattern.
- Now move each stamp ahead in the sequence, one-by-one.
- If using patterned stamps, refine grout lines with a roller tool or jointing tool for a polished look.
Did You Know? Once you start stamping, there’s no stopping! Plan ahead and have extra hands on deck to keep the process moving.
Step 4: Create Control Joints
If control joints weren’t created during the initial finishing process, cut them in now. Cuts should be made every six feet and run the width of the project.

Step 5: Wash Off Release Agent
If using liquid release, removal isn’t necessary. But if powdered release is left one it can prevent stains, sealers, or secondary colors from bonding properly. This should be done once the concrete has set, typically the next day.
- Remove excess powdered release agent using a low-pressure wash or soft broom and water.
- Avoid aggressive scrubbing, which can affect the texture.
- Allow the surface to fully dry before moving on to secondary coloring.
Did You Know? It’s normal for stamped concrete to appear lighter after washing off the release agent. Sealer will bring out the true color!

Step 6: Apply Stain or Antiquing Agent if Desired
If you decide to use a stain or antiquing agent for added depth and character, apply it at this point. To apply stain evenly, use a hand sprayer. To apply an antiquing agents use a soft bristle brush.
- Water-based stains like ARTesian Stain and antiquing agents like Antique-It can be applied to freshly stamped concrete.
- Acid stains require the concrete to undergo a full 28 day cure.

Step 7: Apply Sealer
- On new concrete, apply a cure and seal compound like Gem Cure & Seal with a sprayer. to minimize moisture loss in newly placed and stamped concrete.
- Spray the sealer onto the surface in thin coats, applying it as evenly as possible. Careful application reduces the likelihood of bubbling, puddling, and other problems. We recommend a Swissmex sprayer with a Brickform precision tip.
- When the concrete has cured (typically about 28 days after pouring concrete), clean the surface thoroughly to remove any dirt or debris. After these 28 days, you can apply a full acrylic sealer if you wish to have superior protection. We recommend Brickform Poly-Seal.
- Get more info in our Guide to Sealing Stamped Concrete.
A Word About Stamping Overlays
A stampable overlay is a great way to refresh existing concrete without tearing it out—but proper surface prep is key to success.
Here’s what’s involved:
- Surface Prep – Clean, repair, and roughen the surface for adhesion.
- Application – Spread the overlay evenly with a trowel or squeegee.
- Stamping – Overlays set fast—stamp as soon as it’s firm but pliable.
Once the overlay is down, follow the same stamping steps as a new slab. Refer to the Technical Information Sheet for BRICKFORM Stampable Overlay for complete instructions.
FAQ, Tips, and Considerations
Is It Difficult to Stamp Concrete?
Stamping a concrete surface is definitely not an easy task. It requires attention to detail, proper timing, and knowledge before jumping in. We advise that beginners start with a small project.
What are Some Common Mistakes to Avoid?
Some common mistakes beginners make:
- Not prepping the surface adequately before applying overlays. See more about surface prep.
- Stamping too early or too late. Begin stamping when the concrete is firm enough to hold an impression but still pliable.
- Mishandling the curing process (e.g., allowing it to dry too quickly). Fortunately, Brickform’s DAY1 product helps avoid issues during curing.
Can I Stamp Concrete by Myself?
Stamping concrete is not a one-person job. Have plenty of help on hand to ensure stamps are placed and moved efficiently to avoid delays.
Getting Help with Your DIY Stamped Concrete Project
If you decide that DIYing your stamped concrete surface isn’t for you, contact a contractor near you.
Another option is to contact your local Brickform dealer or concrete supply store and ask if they can put you in touch with one of their customers.
See More